目次
- Bootstrap4と5に両対応したWordPressテーマUnderstrap
- UnderstrapのCSSをカスタマイズする
- Understrap子テーマのstyle.cssをunderstrap-childが読み込むようにする
- 記事一覧ページの記事と記事の間隔が近すぎるのを修正
- 投稿日時などのメタ表示と記事タイトルが近すぎるのを修正
- 記事一覧のアイキャッチ画像を小さくし、記事個別ページではアイキャッチ画像を非表示にする
- 記事一覧ページのアイキャッチ画像のサイズを修正
- 個別記事ページの先頭に表示されるアイキャッチ画像を非表示にする
- 投稿日時を日本語にしてカテゴリーと更新日時を表示する
- Font Awesomeアイコンでカテゴリーと投稿日時、更新日時を表示
- 投稿者名を非表示にする
- 記事フッターの『Posted in WordPress/コメントする』を非表示にする
- WordPress関連記事
Bootstrap4と5に両対応したWordPressテーマUnderstrap
当ブログではXなどで使われているCSSフレームワーク、Bootstrapを内蔵しているWordPress用テーマのUnderstrapを使っています。いました。
現在はAMP対応の自作テーマに移行
この記事ではUnderstrapを使っていてカスタマイズした点をまとめたので、
参考になる箇所があれば使ってください。
UnderstrapのCSSをカスタマイズする
Understrapで使用されているBootstrap4のCSSはほとんどデフォルトのまま。
Bootstrap4の標準のmarginやpaddingの取り方はやや窮屈に感じるので、改善するために導入したCSSを載せておきます。
Understrap子テーマのstyle.cssをunderstrap-childが読み込むようにする
https://github.com/understrap/understrap-child
Understrapの子テーマ例として公開されているunderstrap-childですが、なぜか子テーマ直下のstyle.cssを読み込まないと言う謎設定。
understrap-childでstyle.cssを読み込ませるにはfunctions.phpに以下の記述をしてください。
if (!is_admin()) {
    $the_theme = wp_get_theme();
    wp_enqueue_style('child-understrap-custom-styles', get_stylesheet_directory_uri() . '/style.css', [], $the_theme->get( 'Version' ) );
}
記事一覧ページの記事と記事の間隔が近すぎるのを修正
body:not(.single) article:nth-child(n+2) {
    margin-top: 3rem;
    border-top: .2rem solid lightgray;
    padding-top: 1rem;
}
記事一覧ページも個別記事ページもHTMLの構成はほぼ同じですが、
bodyタグのclassが変わっているのでここで判別できます。
上記のCSSでは
- 『クラス名singleを含まないbodyタグ』の下にある
- 『2個目以降のarticle要素』
のmargin-topを空けると言う指定をしました。
Bootstrapを使用している時は基本的にremと言うフォントサイズ単位でmarginやpaddingを指定した方がいいでしょう。
投稿日時などのメタ表示と記事タイトルが近すぎるのを修正
.entry-meta {
    margin: 1rem;
}
その他色々と細々した修正をしていますが、当然のことながら当ブログのCSSの再利用はご自由にどうぞ。
記事一覧のアイキャッチ画像を小さくし、記事個別ページではアイキャッチ画像を非表示にする
英語圏のテーマに多い気がしますが、さすがにアイキャッチ画像サイズが大きすぎるのでCSSで修正します。
記事一覧ページのアイキャッチ画像のサイズを修正
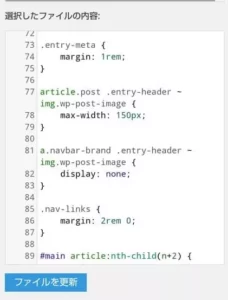
body:not(.single) .entry-header ~ img.wp-post-image {
    max-width: 200px;
    max-height: 150px;
    object-fit: cover;
}
記事一覧ページも個別記事ページもHTMLはほぼ同じですが、やはりbodyタグのクラス名で判別可能。
上記のCSS指定で『クラス名singleを含まないbodyタグ』の下にあるアイキャッチ画像のサイズを変更しました。
object-fitは画像の縦横比をなんかいい感じに調整してくれる属性です。
個別記事ページの先頭に表示されるアイキャッチ画像を非表示にする
body.single .entry-header ~ img.wp-post-image {
    display: none !important;
}
個別記事ページでも記事一覧ページと同じようにアイキャッチ画像が先頭に表示されますが、ほとんどの場合アイキャッチ画像は本文にも含まれるので2回表示されるのはくどいですね。
上記CSSで『クラス名singleを含むbodyタグ』の下にあるアイキャッチ画像を非表示にすると言う指定をします。
投稿日時を日本語にしてカテゴリーと更新日時を表示する
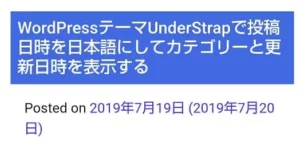
英語圏のテーマは投稿日時の表示に無頓着なことが多いのですが、
Understrapの初期状態の投稿日時表示はさすがにシンプルすぎます。
Font Awesomeのアイコンを使用してカテゴリーと投稿日時、更新日時を表示して少し見栄えを良くしました。
Font Awesomeアイコンでカテゴリーと投稿日時、更新日時を表示
https://github.com/understrap/understrap-child
Understrapは子テーマの使用を推奨しているので、子テーマのfunctions.phpに以下の記述をします。
add_filter('understrap_posted_on', 'mypostedon');

function postedOn() {
    $posted_on = sprintf('<time datetime="%s"><i class="fa fa-calendar pl-2 pr-1"></i>%s</time>', get_the_date('c'), esc_attr(get_the_date()));
    if (get_the_modified_date('Ymd') !== get_the_date('Ymd')) {
        $posted_on = sprintf('<time datetime="%s"><i class="fa fa-refresh pl-2 pr-1"></i>%s</time>', get_the_modified_date('c'), esc_attr(get_the_modified_date())) . $posted_on;
    }
    $categories = get_the_category($post->ID);
    if ($categories) {
        $category = reset($categories);
        $posted_on = sprintf('<i class="fa fa-folder pr-1"></i><a href="%s">%s</a>', get_category_link($category->term_id), $category->cat_name) . $posted_on;
    }
    echo '<span class="posted-on">' . $posted_on . '</span>';
}
子テーマをクラス化している場合の書き方は以下。
add_filter('understrap_posted_on', [$this, 'myPostedon']);

public function myPostedOn() {
    $posted_on = sprintf('<time datetime="%s"><i class="fa fa-calendar pl-2 pr-1"></i>%s</time>', get_the_date('c'), esc_attr(get_the_date()));
    if (get_the_modified_date('Ymd') !== get_the_date('Ymd')) {
        $posted_on = sprintf('<time datetime="%s"><i class="fa fa-refresh pl-2 pr-1"></i>%s</time>', get_the_modified_date('c'), esc_attr(get_the_modified_date())) . $posted_on;
    }
    $categories = get_the_category($post->ID);
    if ($categories) {
        $category = reset($categories);
        $posted_on = sprintf('<i class="fa fa-folder pr-1"></i><a href="%s">%s</a>', get_category_link($category->term_id), $category->cat_name) . $posted_on;
    }
    echo '<span class="posted-on">' . $posted_on . '</span>';
}
Googleの検索結果はtimeタグを拾うらしいので、更新日時を優先的に読み込ませるようにしています。
この変更でGoogle検索結果に更新日時が優先的に表示されるようになりました。
投稿者名を非表示にする
https://github.com/understrap/understrap-child
Understrapは子テーマの使用を推奨しているので、子テーマのfunctions.phpに以下の記述をします。
add_filter('understrap_posted_by', 'myPostedBy');
function myPostedBy() {
    return '';
}
子テーマをクラス化している場合の書き方は以下。
add_filter('understrap_posted_by', [$this, 'myPostedBy']);
public function myPostedBy() {
    return '';
}
一応上書きしやすいようにfilterが設定されているので親切といえば親切ですね。
cssで非表示にするとHTMLソースには投稿者名が残されてしまうので、気になる人はfunctions.phpで対応しましょう。
記事フッターの『Posted in WordPress/コメントする』を非表示にする
子テーマのfunctions.phpに以下の記述をします。
function understrap_entry_footer() {
    return '';
}
関数によってfilterが用意されていたりされなかったりするのが少し気持ち悪いですが、上記のシンプルな記述で記事フッターを完全に非表示にできます。
WordPress関連記事
- WordPressテーマUnderStrapのカスタマイズ例
- WordPressのメディアや記事全文の文字を置換して日付も更新するSQL
- プラグインを使わずにWordPressのショートコードで広告を管理する
- WordPressの絵文字やEasy Table of Contents関係のファイルの読み込みを止める
- WordPressの投稿画面のツールバー・ショートカットキーをカスタマイズする
- プラグインなしでアップロード画像をWebPに変換
- プラグインなしでWordPressの画像入れ替えをする
- WordPressでAMPを使うのをやめた
- Webpに完全に切り替えた

